
Views: 218 Author: Miluo Smart Home Publish Time: 2026-08-21 Origin: Site


Content Menu
● Before You Replace a Bathroom Sink
>> Check These Measurements First
● Tools and Materials You Need
● How to Remove an Old Bathroom Sink
>> 1. Turn Off the Water Supply
>> 2. Disconnect the Water Lines
>> 3. Remove the Drain and P-Trap
>> 4. Cut Through the Existing Sealant
>> 5. Remove Mounting Clips and Lift Out the Basin
>> 6. Clean and Inspect the Countertop
● How to Install a New Bathroom Sink
>> 2. Install the Faucet and Drain
>> 3. Secure the Basin by Mounting Type
>> 4. Connect the Water Supply and Trap
>> 6. Test for Leaks and Drainage
● Professional Installation Checks That Prevent Returns
>> Confirm Faucet-to-Basin Compatibility
>> Avoid These Common Mistakes
● Build a Better Basin Program With Miluo Bath
● FAQ
>> 1. Can I replace a bathroom sink without replacing the countertop?
>> 2. How do I know whether I need an overflow drain?
>> 3. Is a vessel basin difficult to install?
>> 4. Can silicone hold an undermount bathroom sink?
>> 5. Why does my bathroom sink splash?
>> 6. Should I replace the P-trap when replacing a basin?
>> 7. What is the easiest bathroom sink type to replace?
Replacing a bathroom sink is more than a plumbing task—it is a fit, function, and finish decision that affects the entire vanity area. Whether you are upgrading a residential bathroom, specifying products for a hospitality project, or developing a private-label basin range, a successful bathroom sink replacement starts with accurate measurements, compatible components, and a clear installation sequence.
For brands, wholesalers, and project buyers, the most reliable approach is to select a basin system—not simply a bowl. The basin, countertop, faucet, waste, overflow configuration, mounting method, and vanity structure must work together before installation begins.
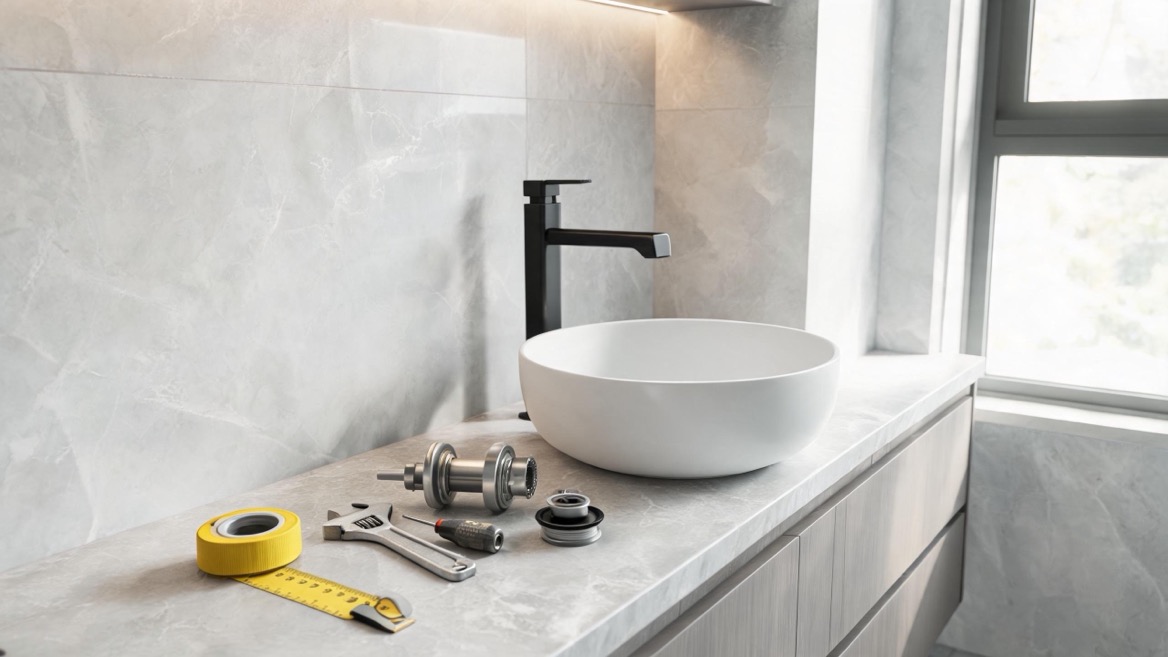
The original replacement guide covers core removal and installation steps, but many real-world failures happen earlier: buyers order an attractive basin without confirming the cut-out, drain position, faucet reach, cabinet clearance, or mounting load.
A well-planned replacement prevents common problems such as:
- A new basin that does not match the countertop opening
- A drain that cannot align with the existing P-trap
- A faucet spout that splashes outside a shallow bowl
- A vessel basin installed too high for comfortable daily use
- An undermount sink that lacks adequate countertop support
- A concealed drawer blocked by drain and waste fittings
- Incompatible overflow and click-clack waste components
Most standard bathroom basins fall within approximately 16–24 inches wide, 12–22 inches front to back, and 5–8 inches deep, though custom projects can vary substantially by design, material, and installation method. The key measurement is never the old sink alone—it is the actual usable vanity space, cut-out, plumbing centerline, and surrounding clearance.
Measure and record the following before ordering a replacement bathroom sink:
| Measurement | Why It Matters | Recommended Check |
|---|---|---|
| Vanity width | Determines maximum basin size | Measure usable counter width, not only cabinet width |
| Counter depth | Prevents an overly deep basin from crowding the walkway | Include backsplash and front overhang |
| Existing cut-out | Critical for drop-in and undermount replacements | Measure length, width, corner radius, and location |
| Drain centerline | Helps align the new basin with the waste pipe | Measure from side wall and back wall |
| Faucet hole layout | Determines whether the new basin and faucet are compatible | Confirm single-hole, three-hole, wall-mounted, or deck-mounted design |
| Bowl depth | Affects splash control and cabinet clearance | Check trap clearance below the basin |
| Faucet spout reach | Controls where water lands inside the bowl | Aim water flow toward the central drain area |
| Finished rim height | Affects comfort and accessibility | Consider basin height plus vanity and countertop thickness |
For layout planning, allow practical movement space in front of the vanity. A minimum clearance of 21 inches may work in compact rooms, while 30 inches generally provides a more comfortable experience. Sink centerlines should also be kept clear of nearby walls or obstructions.
The best replacement sink depends on the existing countertop, desired visual style, installation capacity, and whether the project prioritizes simple replacement or a complete vanity upgrade.
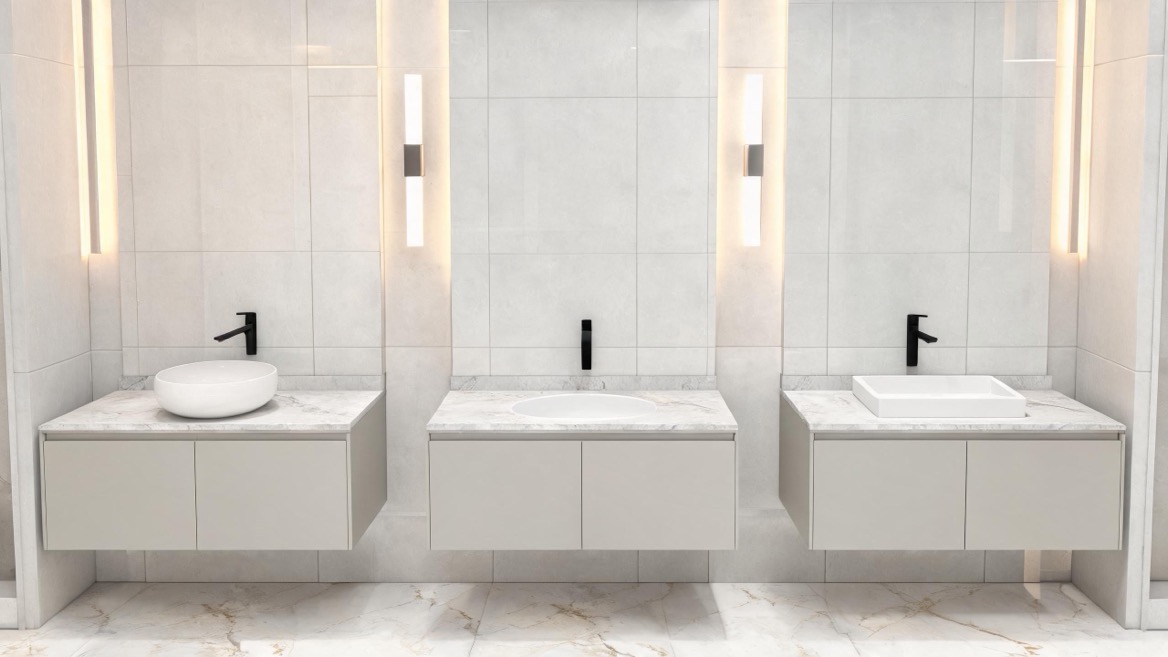
A drop-in basin rests on the countertop through a visible rim. It is often the easiest style for replacing an existing top-mount sink because the rim can cover minor cut-out variations.
Best for:
- Renovation projects with existing countertop openings
- High-volume residential developments
- Buyers seeking straightforward installation
- Countertops where edge finishing is less refined
Considerations:
- The rim creates a visible seam that requires regular cleaning
- The cut-out must still match the manufacturer's template
- Silicone sealing is essential to prevent water intrusion below the rim
An undermount basin is fixed below the countertop, creating a clean, uninterrupted surface. It is popular for premium vanity collections and stone, solid-surface, quartz, or engineered-stone countertops.
Best for:
- Modern and minimalist bathrooms
- Hotels, apartments, and upscale residential projects
- Buyers who value easy countertop cleaning
- Custom vanity programs with stable countertop fabrication
Considerations:
- Installation requires a strong mounting system, not silicone alone
- The countertop fabricator must follow the exact cut-out specification
- The faucet is normally mounted through the countertop or wall, not through the basin rim
A vessel basin sits on top of the countertop and becomes a visual focal point. It offers strong design differentiation for private-label collections, boutique hospitality projects, and high-end residential bathrooms.
Best for:
- Contemporary and luxury bathroom concepts
- Showroom-driven product programs
- Custom ceramic, solid-surface, or stone-look collections
- Projects where distinctive form matters as much as utility
Considerations:
- Total rim height must be calculated before selecting a vanity
- A taller faucet or wall-mounted faucet is usually required
- A deeper or well-proportioned bowl helps reduce splashing
- The countertop needs a correctly sized drain opening and suitable structural support
A wall-mounted sink saves floor space and can make small bathrooms feel more open. It is often selected for compact powder rooms, commercial washrooms, and accessible designs.
Best for:
- Compact bathrooms
- Public or commercial facilities
- Minimalist interiors
- Projects requiring easier floor cleaning
Considerations:
- Wall reinforcement is necessary
- Plumbing may need to be concealed or specified as an exposed design element
- Fixing brackets and load capacity should be confirmed before installation
Prepare all tools before disconnecting the old basin. This reduces downtime and prevents the common mistake of leaving an open drain or water supply while searching for parts.
- Adjustable wrench
- Basin wrench
- Slip-joint pliers
- Screwdrivers
- Utility knife or scraper
- Tape measure
- Spirit level
- Bucket and towels
- Caulking gun
- Drill and appropriate bits, if mounting hardware is required
- New bathroom basin
- Compatible faucet
- Drain assembly or click-clack waste
- P-trap and extension tube if required
- Flexible water supply lines
- Plumber's putty or gasket, according to drain manufacturer instructions
- Neutral-cure sanitary silicone sealant
- Mounting clips, brackets, or adhesive system specified for the basin
- Thread seal tape where appropriate
Do not assume the old drain assembly will fit the new basin. Confirm the drain-hole diameter, overflow requirement, and waste type before beginning. An overflow basin generally requires a compatible overflow drain, while a basin without overflow typically needs a non-overflow waste assembly.
Close the hot- and cold-water shutoff valves below the vanity. Turn on the faucet afterward to release remaining water pressure.
Place a bucket and towels beneath the supply valves and drain trap. Even when valves are closed correctly, residual water will remain in the lines and P-trap.
Use an adjustable wrench to loosen the nuts connecting the faucet supply lines to the shutoff valves. Hold the valve body steady if needed so you do not twist or damage the supply pipe.
If the supply hoses are old, corroded, kinked, or difficult to reconnect, replace them rather than reusing them.
Loosen the slip nuts on the P-trap and tailpiece. Lower the trap carefully into the bucket and remove any remaining water.
If the trap does not align with the new basin drain, do not force it during reinstallation. Use the proper extension tube, trap arm adjustment, or professional plumbing modification.
Use a utility knife to carefully cut through old silicone or caulk around the basin edge. Work slowly to avoid chipping the countertop, scratching ceramic surfaces, or damaging a stone vanity top.
For undermount sinks, inspect from inside the cabinet first. You may find clips, brackets, mechanical fasteners, or adhesive supports that need to be released.
Remove any clips or fasteners holding a drop-in sink in position. Once the seal is fully released, lift the basin out with assistance if it is heavy.
For an undermount basin, support the bowl from below before removing brackets. Heavy ceramic, stone composite, or cast basins can fall suddenly when the final fixing is released.
Remove all old sealant, debris, and adhesive from the mounting surface. Then inspect the countertop for:
- Cracks around the cut-out
- Water damage inside the vanity
- Loose countertop sections
- Swollen engineered wood or MDF
- Damaged cabinet rails
- Mold or persistent moisture staining
This inspection is particularly important for long-term product programs. A high-quality basin cannot compensate for a weakened vanity structure.
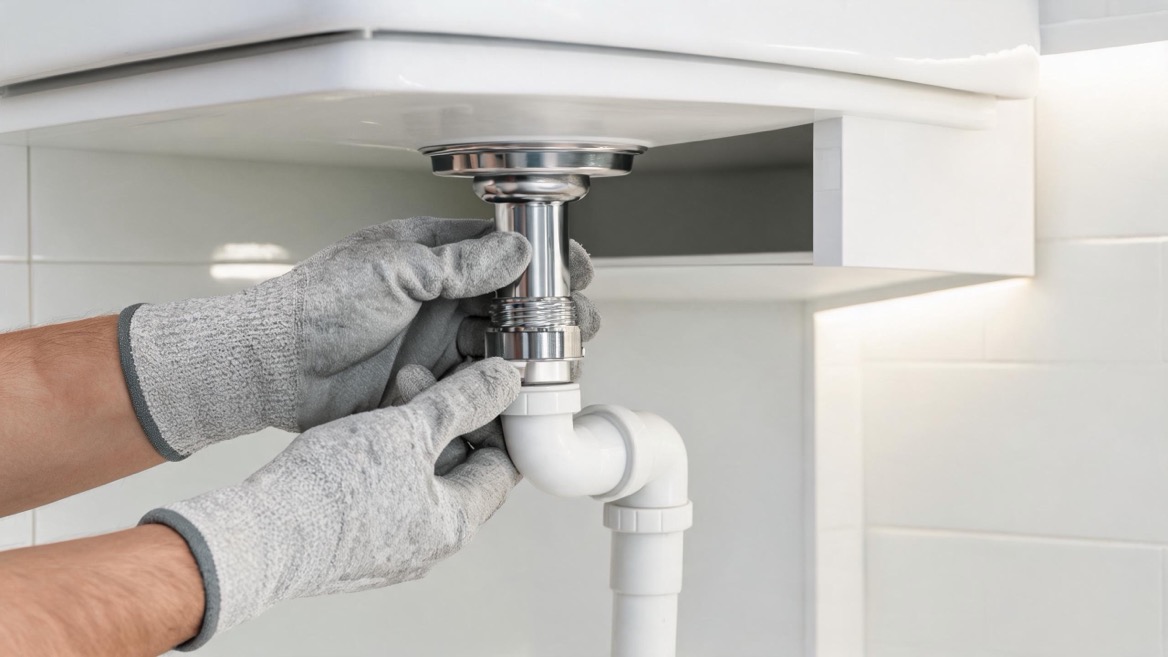
Place the basin in position before applying sealant or tightening hardware. Confirm that it sits level and that all clearances work.
Check these points:
- Does the bowl sit centered on the vanity?
- Does the drain align with the plumbing route?
- Does the faucet spout reach the right position?
- Can the cabinet doors and drawers still open fully?
- Is the basin stable without rocking?
- Is there enough space for the waste and P-trap below?
For a vessel sink, temporarily stack the basin, countertop, faucet, and waste assembly in their final positions. This confirms the finished height and avoids a common mistake: installing a beautiful countertop basin that feels too high for daily handwashing.
In many cases, it is easier to install the faucet and drain before securing the basin permanently.
Follow the hardware manufacturer's guidance for gaskets, washers, and tightening torque. Over-tightening can crack ceramic and damage thin-walled solid-surface or composite basins.
For the drain:
1. Insert the drain body through the basin opening.
2. Use the supplied gasket or plumber's putty only where specified.
3. Tighten the retaining nut evenly.
4. Connect the tailpiece below the basin.
5. Confirm that the drain is vertical and does not pull the basin out of position.
Drop-in basin: Apply a continuous bead of sanitary silicone around the underside of the rim. Set the basin into the opening, press evenly, and secure mounting clips where supplied.
Undermount basin: Use the specified brackets, clips, rails, or engineered mounting method. The countertop must carry the load through an appropriate mechanical support system. Sealant provides a water barrier; it should not be treated as the sole structural support.
Vessel basin: Position the basin over the drain opening, verify alignment, and use the recommended sealing or mounting method. Some vessel basins require only a drain connection and a thin sealing bead; others require a fixing ring or mounting hardware.
Wall-mounted basin: Install approved wall brackets into solid structural backing. Use anchors only where their load rating and wall type are suitable for the basin and expected use.
Reconnect the hot and cold supply lines. Attach the trap to the drain tailpiece and wall outlet without cross-threading the nuts.
Hand-tighten slip-joint connections first, then tighten only enough to seal. Over-tightening plastic fittings can deform washers and create leaks.
Apply a neat, continuous silicone bead where the basin meets the countertop or wall. Smooth it immediately for a clean finish.
Use neutral-cure sanitary silicone for bathroom environments, especially around natural stone, engineered stone, metal finishes, and sensitive surfaces. Allow the sealant to cure according to the product instructions before exposing it to water.
Turn the water back on slowly. Check every connection while water is running, then fill the basin and release the water quickly.
Inspect:
- Supply-line connections
- Faucet base
- Drain flange
- Drain nut
- Tailpiece
- P-trap joints
- Basin perimeter seal
- Overflow path, if applicable
Run both hot and cold water for several minutes. A slow leak may not appear during a brief test.
For basin brands, wholesalers, and project procurement teams, installation guidance should be part of the product package—not an afterthought. The most frequent quality claims are often caused by compatibility gaps rather than manufacturing defects.
A faucet should direct water toward the bowl's central zone rather than the rim or rear wall. If the stream lands too close to the edge, users are more likely to experience splashback and countertop water accumulation.
When specifying a basin and faucet as a set, confirm:
- Spout height
- Spout reach
- Basin depth
- Drain location
- Faucet mounting position
- Water flow angle
- Overflow design
Modern vanities often use drawers rather than open cabinets. That improves storage, but it creates a design challenge: the drain, trap, and supply lines may conflict with the drawer box.
A practical solution is to specify:
- Offset or space-saving trap designs
- Drawer cut-outs
- Shallower upper drawers
- Rear plumbing zones
- Customized vanity interiors matched to the basin geometry
This is where integrated product development provides clear value. Rather than sourcing a basin, vanity, faucet, and drain separately, buyers can reduce installation risk by coordinating the full bathroom system during the design stage.
- Ordering based only on product appearance
- Measuring the old bowl instead of the cut-out and plumbing position
- Ignoring overflow compatibility
- Using silicone as the only support for an undermount basin
- Installing a vessel basin without calculating finished rim height
- Reusing deteriorated supply lines and trap washers
- Applying sealant to dirty, wet, or uneven surfaces
- Skipping the final fill-and-drain leak test
- Tightening ceramic fittings too aggressively
- Assuming every countertop can support every basin type
Many straightforward drop-in replacements can be completed by an experienced installer. However, professional support is recommended when the project involves:
- Relocating water supply or drain pipes
- Cutting stone, quartz, or solid-surface countertops
- Installing a wall-mounted basin
- Supporting a heavy undermount basin
- Repairing water-damaged cabinetry
- Updating electrical components near the vanity
- Meeting commercial, hospitality, or accessibility requirements
A professional installer can also confirm local plumbing requirements before work begins.
A replacement basin should look refined, install efficiently, and perform reliably over years of daily use. For international brands, wholesalers, and bathroom product manufacturers, this means selecting a supplier that understands both product design and installation realities.
Jiaxing Miluo Smart Home Co., Ltd. develops modern bathroom basin and integrated bathroom solutions for OEM and ODM programs. From countertop vessels and undermount basins to coordinated vanity concepts, we help partners develop products around their market position, dimensions, finish requirements, packaging expectations, and installation needs.
Planning a custom bathroom basin collection or a coordinated vanity system? Contact Miluo Bath to discuss your drawings, target market, material requirements, and private-label specifications.
Yes, if the new sink is compatible with the existing cut-out, countertop material, faucet configuration, and drain position. A drop-in sink is often the most forgiving option because its rim can cover small differences around the opening.
Check whether the basin has an overflow hole or internal overflow channel. If it does, use a waste assembly designed for an overflow basin. If it does not, use a non-overflow drain assembly.
A vessel basin is usually straightforward to position, but height and faucet coordination require careful planning. The combined height of the vanity, countertop, and vessel should create a comfortable finished rim height.
No. Silicone helps seal the joint against water, but an undermount sink needs an appropriate mechanical support system, such as clips, brackets, rails, or a manufacturer-approved mounting assembly.
Splashing often occurs when the faucet stream hits the bowl wall, drain cover, or shallow area at the wrong angle. Check faucet reach, water pressure, aerator condition, bowl depth, and the relationship between spout position and drain location.
Replace it if it is corroded, damaged, poorly aligned, or incompatible with the new drain position. If the existing trap is in good condition and aligns correctly, it may be reused, subject to local plumbing requirements.
A drop-in basin is typically the easiest replacement type when the new model fits the existing countertop opening. It generally requires less countertop modification than undermount, vessel, or wall-mounted alternatives.
- [Aquatica USA — How to Install Bathroom Sink]
- [RONA — Your Bathroom Renovation: Measured for Perfection]
- [The Spruce — Bathroom Rough-In Plumbing Dimensions]
- [Wayfair — Bathroom Space-Planning Guidelines]
- [Miluo Bath — Bathroom Sink Dimensions and Standard Sizes Explained]


