
Views: 263 Author: Miluo Smart Home Publish Time: 2026-10-25 Origin: Site


Content Menu
● Before Bathtub Installation: Confirm the Product and Site Requirements
>> Identify the Bathtub Installation Type
>> Prepare the Essential Documents and Materials
● Check Floor Loading, Delivery Access, and Plumbing Positions
>> Assess the Filled Bathtub Load
>> Verify Drain and Faucet Locations
● How to Install a Freestanding Bathtub
>> Step 1: Dry-Fit the Bathtub
>> Step 2: Establish Stable, Level Support
>> Step 3: Assemble the Waste and Overflow
>> Step 4: Connect and Test Before Final Sealing
>> Step 5: Finish the Base as Specified
● How to Install an Alcove or Drop-In Bathtub
>> Prepare the Framing and Opening
>> Install the Approved Support System
>> Connect the Wall and Waterproofing Details
● Bathtub Installation Precautions That Prevent Rework
>> Do Not Conceal Untested Connections
>> Treat Powered Baths as a Separate Installation Category
>> Verify Temperature Protection
● A Practical Bathtub Installation Acceptance Checklist
● OEM and ODM Bathtub Planning: Build Installation Into the Specification
● Plan Your Next Bathtub Project With Miluo
● Frequently Asked Questions About Bathtub Installation
>> Can I install a bathtub myself?
>> Does every bathtub need a mortar bed?
>> Should a bathtub slope toward the drain?
>> Can I use plumber's putty on a bathtub drain?
>> When should the bathtub be tested for leaks?
>> What should buyers confirm before ordering custom bathtubs?
Knowing how to install a bathtub means more than connecting a drain and sealing the edges. A reliable bathtub installation starts with the right support system, accurate plumbing coordination, and a clear plan for testing and future maintenance.
For homeowners, these details protect comfort and property. For bathroom brands, wholesalers, and project buyers, they also influence installation consistency and after-sales service.
Our approach to planning is straightforward: treat the bathtub, floor structure, drainage, waterproofing, and service access as one coordinated system.
This guide explains practical bathtub installation steps for freestanding, alcove, and drop-in models. It also highlights the precautions that buyers should address before approving a custom bathtub for production.
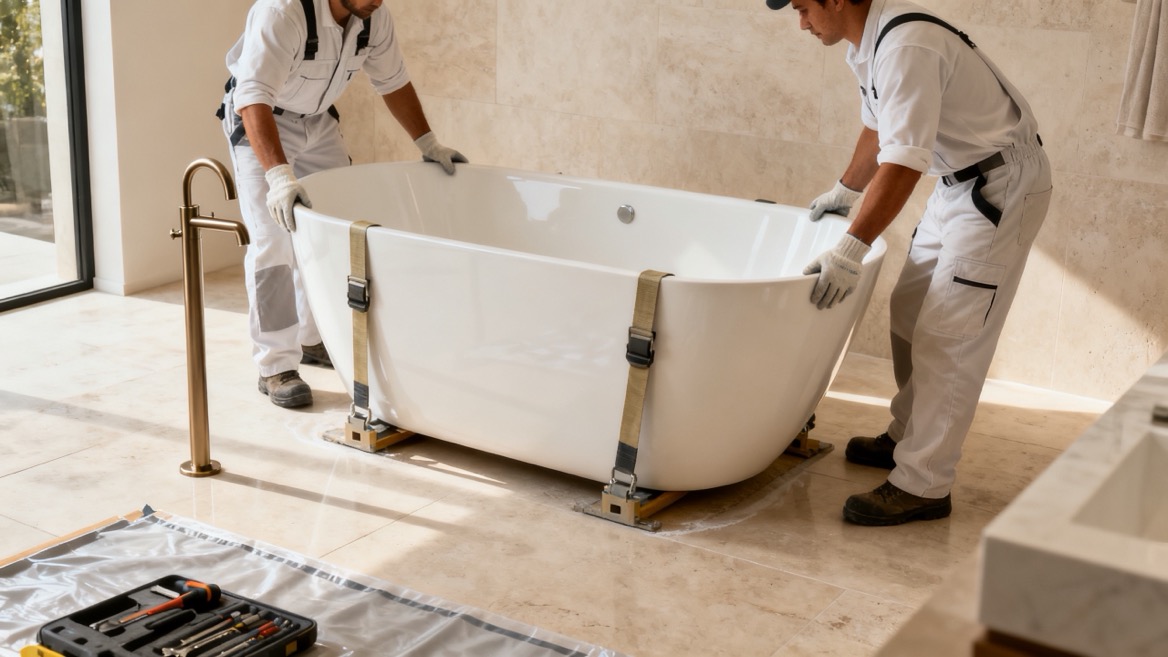
The most important installation document is the manual for the exact bathtub model. Similar-looking products may use different feet, frames, drain assemblies, or base supports.
General guidance should never replace those instructions or the requirements adopted in the installation location. Use qualified professionals for structural assessment, regulated plumbing work, and electrical connections.
| Bathtub type | Installation arrangement | Main planning priority |
|---|---|---|
| Freestanding | Positioned independently or near a wall | Drain alignment, support, and connection access |
| Alcove | Installed within a three-sided recess | Framing accuracy and flange-to-wall detailing |
| Drop-in | Fitted into a prepared deck opening | Correct cutout and independent basin support |
| Whirlpool or air bath | Incorporates powered equipment | Electrical protection and equipment servicing |
A freestanding bathtub is not automatically a simple installation. A concealed drain connection can be difficult to inspect if access was never planned.
Likewise, a drop-in bathtub should not be assumed to hang from its rim. Support arrangements must follow the product design.
Before work begins, assemble:
- Model-specific installation instructions and dimensional drawings.
- Drain and overflow specifications.
- Faucet installation requirements.
- Approved support materials and compatible sealants.
- A level, measuring tools, protective coverings, and suitable lifting equipment.
- A plan for inspecting and servicing concealed connections.
Inspect the bathtub before installation. Record visible damage, verify the model and drain orientation, and confirm that supplied components match the packing list.
Do not permanently install a damaged product while waiting for a replacement decision.
Floor assessment must consider the bathtub, water, occupants, and relevant surrounding construction—not just the empty product.
The support pattern matters too. A bathtub carried on individual feet transfers loads differently from one using a continuous base.
For upper-floor installations, heavy tubs, or uncertain structures, obtain a qualified assessment using the actual product specifications.
A useful planning relationship is:
Total service load = bathtub weight + intended water load + occupant load.
This relationship identifies the loads to consider; it does not establish whether a particular floor is adequate.
Check doorways, stairs, corridors, turning spaces, and the final bathroom entrance before delivery.
Protect finished surfaces and arrange enough people or appropriate lifting equipment. Do not lift a bathtub by its drain, overflow fitting, pipework, or decorative panels.
For commercial projects, review the delivery route before selecting the final bathtub dimensions.
Coordinate the drain center with the actual bathtub drawing, including the finished floor level and connection depth.
Check:
- Clearance around the waste outlet and trap.
- Compatibility between the supplied drain and local plumbing.
- Access for assembly and future repairs.
- Faucet reach into the bathing well.
- Supply-pipe positions and any required faucet reinforcement.
A bathtub that fits the room can still be incompatible with the planned plumbing.
Position the bathtub temporarily using the approved handling method.
Check its relationship to walls, furniture, doors, and the faucet. Leave enough practical space for cleaning and any access required by the manufacturer.
Confirm the drain position before making permanent connections. Do not pull misaligned pipework into place by tightening the fittings.
Use the specified leveling feet, shims, frame, or base arrangement.
Check level at the reference surfaces identified in the manual. The bathing-well floor may already incorporate drainage geometry, so it is not always an appropriate leveling reference.
Confirm that every intended support point carries the bathtub securely.
Do not tilt the entire tub toward the outlet to correct slow drainage unless the manufacturer specifically requires that installation geometry.
Follow the drain assembly instructions for gasket placement, tightening, and sealing.
Sealant compatibility deserves particular attention. Some bathtub materials can be damaged or discolored by plumber's putty. Use only the sealing product approved for the bathtub and drain combination.
Avoid excessive tightening, which can distort gaskets or damage components.
Where an overflow is fitted, connect it as specified. Do not assume that every model uses the same overflow arrangement.
Complete the drain connection through the planned access route or approved installation system.
Inspect accessible joints while filling, holding water, and draining. Check the overflow connection where applicable, following the manufacturer's test procedure.
Correct every leak before concealing connections or applying final perimeter sealant.
Apply base sealant or anchoring only where instructed.
Some models require a particular perimeter treatment or fixing arrangement. Others use different methods. There is no universal rule that every freestanding bathtub must be sealed or anchored identically.
Observe the specified curing period before use.
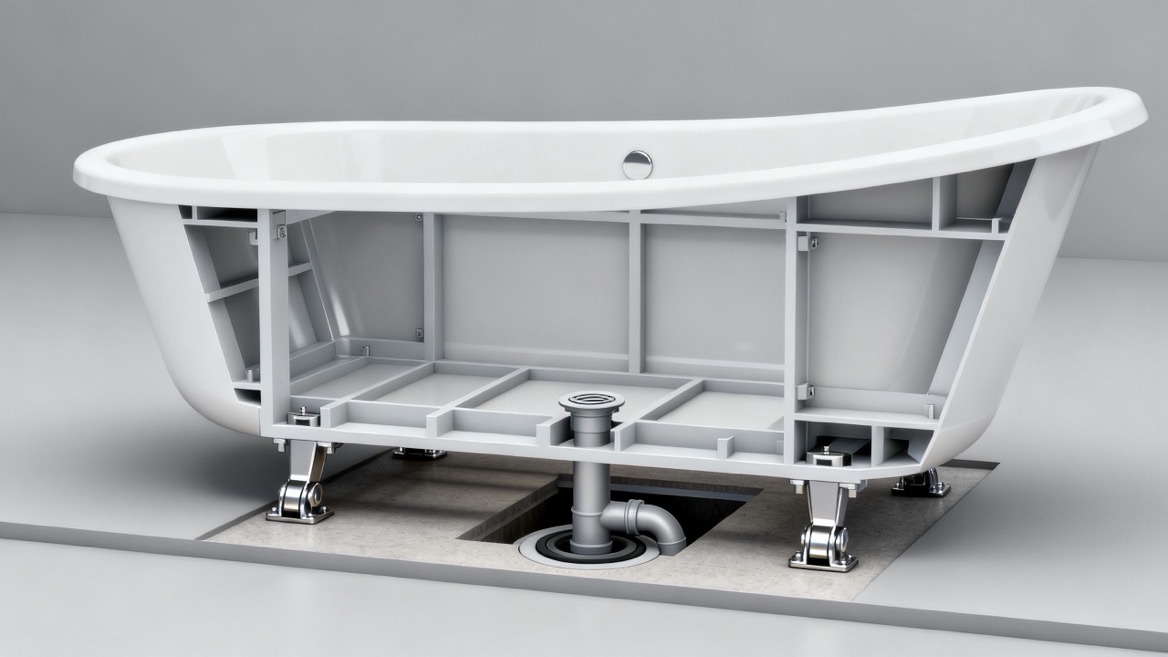
Construct the recess or deck from the model-specific dimensions and template.
Account for framing, substrate, waterproofing, adhesive, and finish thickness. Nominal bathtub dimensions alone are not a reliable cutout specification.
Check that the unit can be placed into the opening without forcing or twisting the shell.
For drop-in installations, include service access in the deck design rather than treating it as a later modification.
Different products may require support feet, an engineered base, a pad, mortar, or another specified arrangement.
Do not substitute expanding foam, loose blocks, or improvised supports without written approval.
The essential principle is support: the bathtub must transfer its operating load through the locations intended by its design.
A rim touching a deck does not prove that the basin is properly supported.
For alcove installations, coordinate the bathtub flange with the selected wall and waterproofing system.
Follow the relevant instructions for fasteners, overlaps, penetrations, and movement joints. Decorative finishes should not be treated as a substitute for a correctly detailed water-management assembly.
Where the bathtub also serves a shower, review the surrounding wet-area construction especially carefully.
Use the specified flexible sealant at finishing joints. Confirm whether the manufacturer requires the bathtub to be loaded with water during sealing or curing; do not apply that practice automatically.
A connection that remains dry during a quick splash test may leak when the bathtub holds water or drains at full flow.
Plan inspection before walls, decks, or access panels are closed.
If connections cannot be observed directly, use the manufacturer's approved testing and inspection method.
A drain assembly may eventually need adjustment or replacement.
Identify how a technician will reach it without unnecessarily removing the bathtub or damaging finished surfaces.
For powered baths, ensure that pumps, controls, and other serviceable components remain accessible as required.
Whirlpool and air baths introduce electrical and equipment requirements beyond those of a conventional soaking tub.
Have a qualified electrician determine the required circuit, protective devices, grounding, bonding, and equipment placement under local rules and product instructions.
Do not energize equipment before the required commissioning conditions are satisfied. In particular, do not assume that a pump can safely run without water.
Safe bathing depends partly on correctly selected and adjusted temperature-control equipment.
For example, the 2024 International Plumbing Code includes a maximum setting of 120°F / 49°C for specified bathtub temperature-limiting arrangements. This is a code provision, not a recommended bathing temperature, and local adoption varies.
Have the installer confirm the applicable requirements and test the installed controls.
Before handover, inspect the installation as a complete working system.
| Checkpoint | Acceptance question |
|---|---|
| Product condition | Is the surface free from installation damage? |
| Support | Are all specified supports engaged and stable? |
| Level | Does the bathtub meet the manual's leveling requirements? |
| Drain | Does water discharge without visible leakage? |
| Overflow | Has the fitted overflow been connected and tested? |
| Faucet | Are supply connections dry and operation satisfactory? |
| Sealing | Are required joints complete and properly cured? |
| Access | Can serviceable components be reached? |
| Documentation | Are instructions and maintenance information available? |
Test filling, water retention, overflow operation where applicable, and draining as separate stages.
Record photographs of accessible connections and support details before concealment. Keep the model number and installation records with the project handover documents.
For multi-unit developments, use a consistent checklist for every bathroom rather than accepting one sample installation as proof of all units.
For international brands and wholesalers, installation instructions should be part of product development—not an afterthought after packaging approval.
A recommended technical package includes:
- Dimensioned drawings with tolerances and drain coordinates.
- Product weight, water-capacity information, and support requirements.
- Compatible waste and overflow specifications.
- Clear installation sequences and component identification.
- Sealant restrictions, service-access requirements, and maintenance guidance.
Before releasing a customized bathtub, arrange a representative installation review with the intended accessories and relevant floor or deck construction.
This can reveal problems that a visual sample inspection misses, such as insufficient connector clearance or inaccessible fittings.
Do not assume that a drain suitable for one destination market is automatically suitable elsewhere.
Jiaxing Miluo Smart Home Co., Ltd. focuses on customized modern bathroom products and OEM and ODM solutions for overseas brands, wholesalers, and manufacturers. Bringing installation requirements into the initial brief helps align product design with the conditions buyers expect to encounter.

A successful bathtub installation begins before production and ends with documented testing.
For your next private-label collection or bathroom project, contact Jiaxing Miluo Smart Home Co., Ltd. with your target market, preferred bathtub style, project drawings, estimated quantity, and installation constraints. Request an OEM or ODM discussion that considers product design and installation requirements together.
Some preparation tasks may be suitable for experienced homeowners. Plumbing alterations, electrical work, structural decisions, and permit-controlled tasks should be handled by appropriately qualified professionals. Follow local requirements and the product manual.
No. Some products use feet, frames, pads, or engineered bases. Others specify or permit mortar. Use the support method approved for the exact model rather than choosing by appearance or material alone.
Generally, install the bathtub level at the manufacturer's stated reference points. Its internal geometry normally manages drainage. Investigate support, outlet alignment, or blockage instead of arbitrarily tilting the unit.
Only when the bathtub and drain manufacturers permit it. Some product instructions prohibit putty because it can damage the material. Use the specified sealant and gasket arrangement.
Test before concealed connections become inaccessible and before final handover. Follow the prescribed sequence, including filling, holding water, checking the fitted overflow, and draining.
Confirm dimensions, support design, drain compatibility, faucet coordination, delivery access, service access, and destination-market requirements. Agree on the installation documentation alongside the product specification.
1. [KingKonree — "How to Install the Bathtub: Precautions for Installing the Bathtub," July 9, 2021]. Its installation statements are not treated as universal technical requirements. [kingkonree]
2. [Kohler — Installation Guide, document 1267144-2-C]. Model-specific examples covering floor support, support feet, leveling, plumbing access, sealant compatibility, and wall finishing. These details illustrate why exact product instructions take precedence over general advice. [techcomm.kohler]
3. [Kohler / Sterling — Installation Guide, document 1236783-2-A]. Guidance on drop-in framing, subfloor support, approved bedding arrangements, avoiding rim-only support, and checking plumbing connections for leaks. [resources.kohler]
4. [American Standard — Freestanding Tub Installation Instructions]. Product-specific examples of drain-position planning, level requirements, access-panel connections, and silicone application. [pdf.lowes]
5. [International Code Council — 2024 International Plumbing Code, Chapter 4: Fixtures, Faucets and Fixture Fittings]. Reference for bathtub plumbing and temperature-control provisions; applicability depends on locally adopted rules. [codes.iccsafe]
6. [UpCodes — Denver 2024 IPC, Chapter 4, Sections 407.2 and 412.5]. Accessible section text concerning bathtub waste and overflow connections and the 120°F / 49°C maximum setting for the specified temperature-limiting arrangements. [up]


