
Views: 208 Author: Miluo Smart Home Publish Time: 2026-08-14 Origin: Site


Content Menu
● Why Bathtub Jets Need More Than Surface Cleaning
● Before You Clean a Jetted Bathtub
● How to Clean Bathtub Jets Step by Step
>> Step 1: Remove Visible Residue
>> Step 2: Perform a Water-Only Pre-Flush
>> Step 3: Fill the Tub With Warm Water
>> Step 4: Add a Low-Foaming Cleaner
>> Step 5: Run the Jets for 10–15 Minutes
>> Step 6: Drain and Wipe the Tub
>> Step 7: Run a Fresh-Water Rinse Cycle
>> Step 8: Dry the Bathtub and Jet Area
● How Often Should You Clean Jetted Tub Jets?
● What Not to Put in a Jetted Bathtub
● When Debris Keeps Coming Back
● Material-Safe Care for Modern Bathtubs
● Build a Better Bathtub Maintenance Routine
>> Can I use vinegar to clean bathtub jets?
>> How long should I run bathtub jets during cleaning?
>> Why are black flakes coming out of my bathtub jets?
>> Can I use bath bombs in a jetted bathtub?
>> Is bleach safe for jetted bathtub cleaning?
>> How do I clean around difficult bathtub jet openings?
>> How can a bathtub supplier make maintenance easier for end users?
A jetted bathtub should feel restorative—not leave you wondering why dark particles, cloudy water, or a musty smell appear when the system starts. Knowing how to clean bathtub jets correctly helps remove trapped bath residue from the jet faces, internal plumbing, and water channels while protecting the tub's finish, seals, and pump.
For homeowners, hotels, and property managers, routine jetted tub cleaning is not merely about appearance. It is a simple maintenance habit that supports smooth water flow, a more pleasant bathing experience, and longer-lasting components. The right process is gentle, repeatable, and compatible with the specific bathtub model.
This guide explains how to clean bathtub jets step by step, which cleaning products to avoid, how often to flush a whirlpool bathtub, and what to do when debris keeps coming back.

A standard bathtub is relatively easy to rinse and wipe down. A jetted bathtub is different because it includes internal water lines, jet bodies, intake controls, seals, and a pump system. Water does not only touch the visible bath surface—it also circulates through hidden passages.
After bathing, small amounts of body oil, soap residue, hair products, bath additives, minerals, and airborne dust can remain inside those passages. Over time, this residue may collect along the inner walls of the plumbing.
Common signs that your bathtub jets need cleaning include:
- Black or brown flecks appearing in the water when jets run
- A stale, sour, or musty odor during operation
- Visible residue around jet openings
- Weak or uneven water pressure
- Foam that persists after the bath has drained
- A bathtub that looks clean but still releases particles during a rinse cycle
The key point is simple: wiping the tub wall is useful, but it does not flush the hidden parts of a whirlpool system. A proper cleaning cycle moves water through the internal plumbing, where most invisible buildup is located.
Always start with the bathtub's care instructions. Different systems may use acrylic, solid surface material, enamel-coated steel, fiberglass, or composite structures. Jet assemblies can also vary in design.
Some manufacturers recommend specific cleaning solutions, valve positions, or run times. Following those instructions takes priority over a general method.
Before beginning a bathtub jet cleaning cycle, inspect the following:
| Item to Check | Why It Matters | What to Do |
|---|---|---|
| Water level | A low water level can draw air into the system | Keep water at least 2–3 inches above the highest jet |
| Jet covers | Loose debris may be trapped around the openings | Wipe with a soft cloth and clean gently with a soft brush |
| Air controls | Their position can affect circulation | Follow the product manual before closing or opening controls |
| Cleaner type | Harsh chemicals may harm finishes or components | Use a low-foaming, material-compatible cleaner |
| Removable parts | Some covers or filters need separate care | Remove only if the manufacturer permits it |
Never run a water-jet system dry unless the manufacturer specifically states that it is safe. Dry operation can place unnecessary stress on the pump and internal parts.
Also, avoid treating every jetted bathtub like an old-fashioned whirlpool model. Modern tubs can integrate air jets, water jets, chromotherapy components, digital controls, heated surfaces, and different materials. The cleaning routine should match the product configuration.
This method works as a practical baseline for many water-jet bathtubs. It uses warm water, low-foaming detergent, a rinse cycle, and gentle manual detailing.
Prepare the following before you begin:
- Warm and cool water
- A low-foaming dishwasher detergent or a manufacturer-approved jet cleaner
- Distilled white vinegar, if compatible with the bathtub manual
- Soft microfiber cloths
- A soft toothbrush or small detail-cleaning brush
- A non-abrasive sponge
- Gloves, if required by the selected cleaning product
Do not use steel wool, abrasive pads, scouring powders, or highly aggressive chemicals on acrylic or other sensitive bathtub finishes. These products can scratch the surface, dull the gloss, or affect seals and fittings.
Start with the bathtub switched off and empty.
Use a microfiber cloth or non-abrasive sponge to remove visible hair, dust, soap film, and residue from the rim, overflow area, drain area, and jet faces. This prevents loose debris from circulating back through the system during the flush.
Pay close attention to the narrow space around each jet cover. A soft toothbrush is useful for these small areas.
Fill the bathtub with cool or lukewarm water until the water line is at least 2–3 inches above the highest jet.
Run the jets for approximately 10 minutes, then turn them off and drain the bathtub.
This pre-flush is especially valuable if the bathtub has not been used for several weeks. It removes loose particles before cleaning solution is introduced and lets you see whether the system is releasing visible debris.
Refill the bathtub with warm water. Again, make sure all water jets are fully submerged.
Water that is too hot is unnecessary. Warm water helps loosen oils and residue while remaining more comfortable and manageable during cleaning. Check the product instructions if your bathtub material or system has a recommended temperature range.
Add the selected cleaning solution according to the product label or bathtub manufacturer's guidance.
A common household approach uses a small amount of low-foaming dishwasher detergent. If mineral deposits are a concern and the manufacturer permits it, distilled white vinegar may also be used as part of the cleaning cycle.
Important safety rule: never mix bleach with vinegar, ammonia, or other household cleaners. Combining chemicals can create hazardous fumes or damage bathtub components.
Avoid excessive detergent. More soap does not mean a better clean. Too much foam can be difficult to rinse from internal plumbing and may create unnecessary residue.
Turn on the bathtub jets and let the system circulate for 10–15 minutes.
If the bathtub has adjustable air controls, follow the product manual. Some systems may clean more effectively with air induction reduced, while others are designed for a different setting. The correct setup depends on the model.
During this stage, you may see particles, foam, or residue enter the bath water. This is not necessarily a sign that the cleaning method has failed. It can indicate that buildup is being released from the internal lines.
Turn off the jets and fully drain the bathtub.
Use a soft cloth to wipe away any visible residue left on the tub walls, bottom, or around jet outlets. Do not let released particles dry on the surface, especially on glossy acrylic finishes.
For stubborn residue around the jet face, use a damp soft brush. Do not force tools behind jet covers or attempt to dismantle fixed fittings unless the manufacturer's instructions specifically allow it.
Refill the bathtub with clean water to the same level—at least 2–3 inches above the jets.
Run the jets for another 10–15 minutes with no cleaning solution added. This rinse cycle is essential because it helps flush detergent, vinegar, loosened residue, and remaining particles from the plumbing.
Drain the bathtub completely once the rinse is complete.
Finish by wiping the bathtub dry with a clean microfiber cloth.
Drying is a small but worthwhile step. It reduces water spotting, helps limit mineral marks, and makes it easier to notice any remaining debris around the jet outlets.
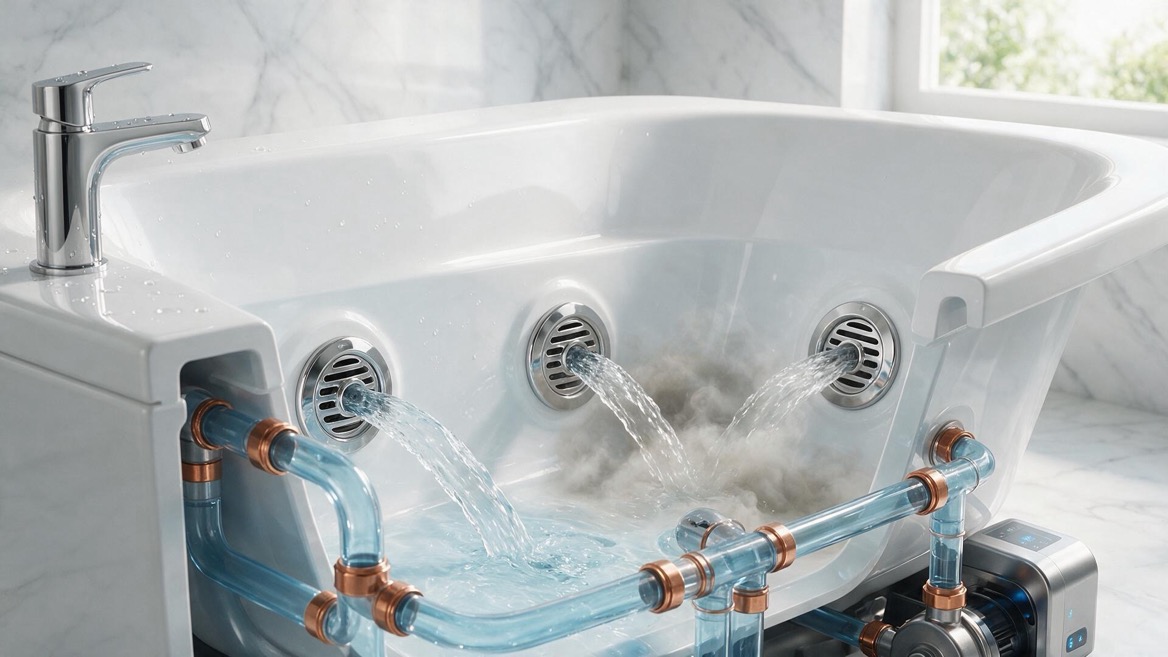
The right cleaning frequency depends on actual usage, water quality, and the types of bath products used.
| Usage Pattern | Recommended Routine |
|---|---|
| Used occasionally | Flush and clean before use after a long idle period; deep clean monthly during active use |
| Used once or twice a week | Full internal cleaning every month |
| Used several times a week | Full internal cleaning every two weeks |
| Used with bath oils, bubble bath, or salts | Rinse after each use and clean more frequently |
| Hard-water location | Increase cleaning frequency and inspect for mineral residue |
A quick after-use routine makes deep cleaning easier:
1. Drain the tub immediately after bathing
2. Rinse away soap, oil, and product residue
3. Wipe the jet faces and bathtub surface with a soft cloth
4. Leave the tub dry and ventilate the bathroom
This takes only a few minutes, but it can reduce the amount of material that remains around the jets and internal water path.
Many bathtub performance issues begin with products that seem harmless in an ordinary tub. Bath oils, thick bubble baths, bath bombs, and heavily pigmented products can leave residue in hidden channels.
Be cautious with the following:
- High-foam bubble bath: Foam may travel into internal lines and take several rinse cycles to remove
- Bath oils: Oils can coat plumbing surfaces and attract residue
- Bath salts: Some salts may not dissolve fully and can leave deposits
- Strong chlorine bleach: Frequent use can be unsuitable for certain seals, finishes, and internal components
- Abrasive powders: These may scratch acrylic, composite, or polished surfaces
- Drain cleaners: These are not designed for recirculating jet systems and can be highly corrosive
If a customer wants to use bath products regularly, a more practical approach is to choose products labeled as low-residue and to run a clean-water flush afterward. For hospitality projects, this should be part of the room-maintenance procedure rather than left to occasional deep cleaning.
If particles continue to emerge after one complete cleaning cycle, repeat the fresh-water rinse before trying stronger products. Several cleaning cycles may be needed when the bathtub has been unused for a long time or has accumulated a heavy residue load.
Persistent debris can also point to a maintenance or installation issue.
- Confirm that the tub is filled high enough before each jet cycle
- Check whether jet covers can be safely cleaned or removed according to the manual
- Inspect the intake cover and accessible filters, if fitted
- Verify that the drain area is clean and draining normally
- Review the bathtub manual for approved deep-cleaning products
- Contact a qualified service technician if water flow is weak, a pump sounds unusual, or leakage is present
Do not attempt to disassemble pump housings, electrical components, or sealed plumbing connections. A cleaning issue should never turn into a safety risk or an avoidable warranty problem.
From a product-development perspective, a high-end bathtub should be designed for both visual impact and manageable daily care. Jet placement, smooth internal surfaces, accessible fittings, durable seals, and clear maintenance guidance all influence the ownership experience.
For acrylic and composite bathtubs, gentle cleaning is usually the right long-term strategy. A soft cloth, mild detergent, and regular rinsing protect the surface better than aggressive chemical treatments.
For brands, wholesalers, and project buyers, maintenance should also be considered during product selection. Ask suppliers practical questions such as:
- Which cleaning agents are approved for the bathtub material?
- Are jet covers removable for routine servicing?
- Is there a dedicated flushing or self-cleaning function?
- What is the recommended cleaning interval?
- Are replacement jet components available?
- Can the system be adapted for local electrical and plumbing standards?
A bathtub may look impressive in a showroom, but easy maintenance determines how well it performs in real homes, apartments, hotels, and wellness projects over time.

A clean jetted bathtub is the result of consistency, not harsh cleaning. Use enough water to cover the jets, choose a low-foaming compatible cleaner, complete a fresh-water rinse, and dry the tub afterward. These steps help keep the system ready for a more comfortable and reliable bathing experience.
For brands, wholesalers, and manufacturers looking to develop modern bathtubs with configurable jet systems, durable materials, and market-specific design options, Jiaxing Miluo Smart Home Co., Ltd. provides OEM and ODM bathtub solutions tailored to private-label and project requirements. Contact our team to discuss your product specifications, customization needs, and production plans.
Distilled white vinegar is commonly used to help address mineral residue and light buildup, but you should first confirm that it is compatible with your bathtub material and manufacturer instructions. Never combine vinegar with bleach or other cleaning chemicals.
A typical cleaning run lasts 10–15 minutes, followed by a separate fresh-water rinse cycle of around 10–15 minutes. Always keep water at least 2–3 inches above the jets during operation.
Dark flakes can be old residue released from the internal plumbing, including soap film, body oils, bath additives, or accumulated material. Complete a cleaning cycle and rinse cycle; repeat if needed.
It depends on the bathtub manufacturer's instructions. Bath bombs can contain oils, colorants, glitter, or undissolved ingredients that may leave residue in the jet system. Low-residue products and a post-use rinse are generally safer choices.
Bleach is not ideal for routine cleaning unless the manufacturer specifically approves it. It may be incompatible with certain seals, finishes, and internal components. Never mix bleach with vinegar, ammonia, or other cleaners.
Use a microfiber cloth, soft toothbrush, or small non-abrasive detailing brush. Avoid sharp tools, metal brushes, or forced disassembly, as these can damage the jet face or surrounding bathtub surface.
Suppliers can improve usability through accessible jet designs, smooth and durable surfaces, clear maintenance instructions, low-residue system configurations, dependable replacement parts, and optional cleaning or flushing functions.
- Lowe's. [How to Clean a Jetted Tub Easily]. Guidance on jet flushing, water levels, low-foaming detergent, vinegar use, rinse cycles, and recommended cleaning frequency. [lowes]
- Good Housekeeping. [How to Get Hidden Gunk Out of Your Jetted Tub, According to Pros]. Expert-led guidance on monthly cleaning, detergent flushing, cold-water rinsing, hard-water care, and chemical safety. [goodhousekeeping]
- Ferguson Home. [7 Tips on How to Clean Bathtub Jets]. Practical recommendations for low-foam cleaning, jet rinsing, and cleaning difficult-to-reach jet areas. [fergusonhome]
- Kohler Walk-In Bath. [Things to Consider When Cleaning Your Jetted Tub]. Guidance on water level, air controls, cleaning duration, and routine jetted-tub maintenance. [kohlerwalkinbath]
- Lysol Canada. [How to Clean a Jetted Tub]. Detailed process for visible-debris removal, cleaning internal components, jet operation, and final rinsing. [lysol]


