
Views: 220 Author: Miluo Smart Home Publish Time: 2026-08-27 Origin: Site


Content Menu
● Alcove Tub vs. Freestanding Tub: The Essential Difference
● Why Homeowners Replace an Alcove Tub
>> Common motivations for the conversion
● Before Removing the Alcove Tub
>> 1. Measure the real usable bathroom space
>> 2. Confirm the drain position
>> 3. Evaluate water supply and faucet location
>> 4. Inspect floor level and structural capacity
● Alcove-to-Freestanding Conversion Process
>> Step 1: Select the bathtub and complete specification review
>> Step 2: Protect the site and remove the old alcove tub
>> Step 3: Relocate the plumbing rough-in
>> Step 4: Rebuild the floor and waterproof the bathing zone
>> Step 5: Dry-fit, level, connect, and test
● Choosing the Right Freestanding Bathtub Material
● Contractor Mistakes That Create Callbacks
>> Avoid these frequent mistakes
● When an Alcove Tub Is Still the Better Choice
● Build a Better Freestanding Tub Program
● FAQ
>> Can I replace an alcove tub with a freestanding tub in the same location?
>> Does a freestanding bathtub require floor reinforcement?
>> Can a freestanding tub be installed against a wall?
>> Is a floor-mounted tub filler difficult to install?
>> What is the biggest challenge when converting from an alcove tub?
>> Should a freestanding bathtub be caulked to the floor?
>> Are freestanding tubs harder to clean than alcove tubs?
Replacing an alcove tub with a freestanding model can transform an ordinary bathroom into a high-value, spa-inspired space. However, this is not simply a bathtub swap. It often changes the drain location, faucet configuration, waterproofing strategy, floor-load requirements, cleaning access, and the sequence of trades on site.
For contractors, developers, bathroom brands, and renovation specialists, success depends on evaluating the entire installation system—not just selecting an attractive freestanding bathtub. This guide compares alcove and freestanding tubs, explains the key technical challenges, and provides a practical process for planning a durable, premium installation.

An alcove bathtub is installed between three walls. It is usually paired with a tiled surround, shower wall system, or prefabricated enclosure. This layout is common in compact bathrooms because it uses space efficiently and helps contain water.
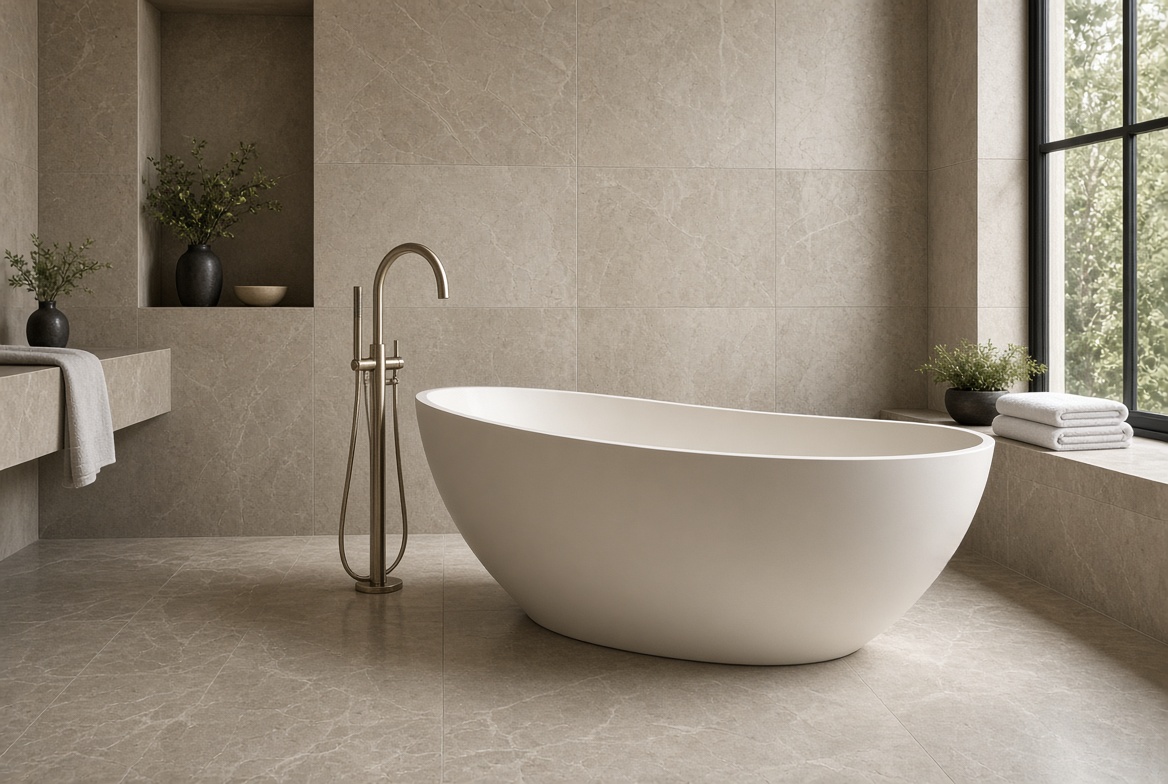
A freestanding bathtub stands independently from surrounding walls. It can be positioned near a wall, beneath a window, in the center of a larger bathroom, or within a wet-room layout. The tub becomes a visible design feature rather than a concealed fixture.
The decision is not only aesthetic. A contractor should assess plumbing access, room dimensions, floor structure, daily bathing habits, maintenance expectations, and local inspection requirements before recommending a conversion.
| Factor | Alcove Tub | Freestanding Tub |
|---|---|---|
| Installation location | Between three walls | Independent placement on finished floor |
| Best for | Compact bathrooms and tub-shower combinations | Larger bathrooms and premium soaking zones |
| Plumbing arrangement | Drain commonly near wall or end of tub | Drain often needs to align beneath the tub |
| Faucet options | Wall-mounted, deck-mounted, tub-shower valve | Floor-mounted, wall-mounted, deck-mounted |
| Water containment | Strong, especially with shower surround | Requires careful splash planning |
| Cleaning access | Easy at the front; hidden areas are enclosed | Easy around the tub if adequate clearance is provided |
| Design impact | Functional and space-efficient | High visual impact and premium positioning |
| Renovation complexity | Often lower when footprint remains unchanged | Often higher because rough-in plumbing may move |
| OEM/ODM opportunity | Standardized sizes and configurations | Greater customization in shape, finish, overflow, and accessories |
A well-designed freestanding tub can create a strong visual focal point. But when the room is too narrow, the drain cannot be relocated properly, or the floor is not prepared for the load, an alcove bathtub may remain the more practical solution.
In my experience working with premium bathroom product projects, the strongest reason for replacing an alcove tub is usually not capacity. It is the desire for a more open, intentional, and design-led bathroom.
Freestanding models are especially popular in primary bathrooms, boutique hospitality projects, luxury apartments, and remodels where the shower is already separated from the tub area. In a 2024 Houzz trend report, freestanding flat-bottom tubs were the most selected tub type in wet-room projects, chosen by 36% of homeowners, closely followed by alcove tubs at 35%. This indicates that both categories remain relevant, but serve different layouts and lifestyles.
- Creating a premium spa-style bathroom
- Removing an outdated tub-shower combination
- Enlarging or redesigning a primary bathroom
- Improving visual openness around the bathing zone
- Adding a deeper soaking experience
- Supporting a higher-end residential or hospitality positioning
- Coordinating the bathtub with floor-mounted fillers and modern tile finishes
For international bathroom brands and project buyers, the strongest product strategy is often to offer both solutions. Alcove tubs serve volume-oriented and space-sensitive markets, while freestanding bathtubs provide more opportunities for differentiated design, material upgrades, and private-label customization.
A contractor should never begin demolition based solely on the exterior dimensions of the new tub. The alcove installation hides important conditions behind the apron, wallboard, tile, and plumbing cavity.
Before ordering or removing anything, inspect the existing system carefully.
Measure the length and width of the room, but also document door swing, vanity depth, toilet clearance, shower circulation, windows, heating elements, and floor transitions.
A freestanding tub may physically fit within a room but still create an uncomfortable path around the bathroom. The user should be able to enter, clean, step in, and reach the tub filler without squeezing between fixtures.
As a practical planning rule, leave enough clearance around the tub for cleaning and service access. Some installation guidance recommends approximately 20 inches of surrounding clearance for accessibility, although the appropriate dimension must always reflect the project layout and applicable local requirements.
This is the issue that most often determines whether an alcove-to-freestanding tub conversion remains straightforward or becomes a major renovation.
An alcove bathtub may have a drain located near a wall. A freestanding soaking tub may require a floor drain directly below its center, end, or offset outlet. If the new drain does not align with the existing trap and waste line, the contractor may need to open the subfloor or concrete slab.
Check:
- Existing drain centerline
- New tub waste outlet location
- Drain and overflow kit dimensions
- P-trap location and serviceability
- Pipe diameter and venting arrangement
- Structural framing below the floor
- Whether the floor is wood-framed or concrete
A dry fit is essential. Place the tub footprint on the finished floor plan, mark the drain center, and compare it with the actual rough-in—not the original drawings.
An alcove tub often uses a wall-mounted faucet or a combined shower valve. A freestanding bathtub may use:
- A floor-mounted tub filler
- A wall-mounted filler
- A deck-mounted filler on a nearby ledge
- An integrated faucet system, depending on the tub design
Floor-mounted fillers create a premium look but require supply lines to be routed through the floor. That may be simple in a new build and considerably more complex in a slab-on-grade renovation.
Wall-mounted fillers can simplify floor work, but the spout reach must be carefully matched to the bathtub rim. Avoid choosing the faucet after the tub has been installed. Confirm the faucet height, reach, valve depth, and service access in advance.
A freestanding tub must sit on a flat, stable, finished surface. Even a small amount of rocking can strain plumbing connections, damage sealant, and create long-term user complaints.
The load calculation should include:
Total load = Bathtub weight + Water weight + Occupant weight
Water weighs approximately 8.34 pounds per U.S. gallon. A large solid-surface soaking tub filled with water can place a substantial load on an upper-floor structure.
Inspect:
- Joist direction and spacing
- Subfloor thickness and condition
- Existing signs of deflection or movement
- Tile substrate and waterproofing system
- Floor flatness beneath the tub base
- Need for joist reinforcement or structural review
This is especially important for cast iron tubs, stone composite tubs, and large-capacity models. If there is uncertainty, involve a qualified structural professional before installation.
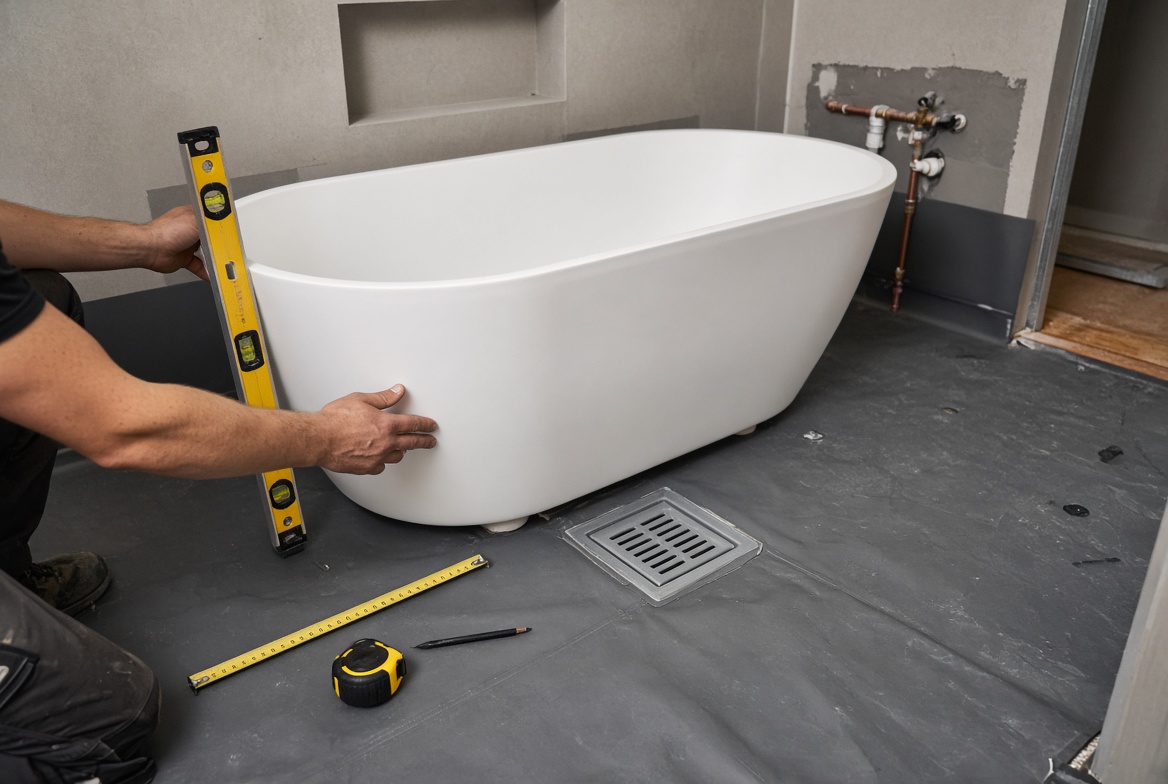
A disciplined installation sequence reduces rework. The most expensive mistakes often occur when the tub arrives after plumbing, tile, and electrical decisions have already been finalized.
Collect the manufacturer's technical drawing before demolition. Confirm the exact model, not a similar product image or preliminary sample.
Review:
- Overall length, width, and height
- Net and gross weight
- Water capacity
- Drain outlet location
- Overflow position
- Base dimensions
- Recommended faucet type
- Required installation clearance
- Drain kit compatibility
- Material and surface-care requirements
For OEM and ODM bathtub programs, this stage is where buyers should confirm branding needs, color options, finish requirements, packaging standards, certifications, and regional plumbing compatibility.
Shut off water supplies and protect surrounding finishes before demolition. Remove fixtures, wall coverings, tub surround materials, and the old bathtub in a controlled sequence.
Inspect the opened wall and floor area for:
- Water damage
- Mold or staining
- Corroded supply lines
- Damaged framing
- Inadequate insulation
- Unsecured drain piping
- Missing or deteriorated waterproofing
Do not cover damaged framing or subflooring simply to keep the project moving. Repairing concealed problems at this stage is far less costly than reopening a finished bathroom later.
Once the floor is open, set the final drain center based on the selected freestanding tub. Install or reposition the trap and waste line as required. Confirm that venting and drainage comply with applicable plumbing requirements.
Every bathtub installation should include a trap to help prevent sewer gases from entering the room. The drain, overflow, and connection method should follow the bathtub manufacturer's instructions and the requirements enforced by the local authority.
Before closing the floor:
- Pressure-test supply connections
- Verify drain slope and alignment
- Confirm the drain is centered accurately
- Check the tub filler rough-in height and position
- Photograph concealed work for project records
- Keep required access points available
Freestanding does not mean waterproofing is less important. A tub may stand away from the wall, but water can still reach the floor through splashing, cleaning, condensation, overflow, or a failed connection.
A robust approach may include:
- A stable and level subfloor
- Approved underlayment for tile or stone
- Waterproof membrane in vulnerable areas
- Sealed transitions around penetrations
- Properly finished flooring beneath the entire tub footprint
- Moisture-resistant wall finishes near the tub
Do not install a freestanding tub on unfinished flooring. If the tub must be moved for future service, the entire visible area should already be complete and durable.
Bring the tub into the room before final placement whenever possible. Large tubs may not pass through finished doorways or around tight corners after the renovation is complete.
Use protective materials under the tub during positioning. Never drag an acrylic, solid-surface, or coated metal tub across tile or stone.
The final installation sequence should include:
1. Assemble the drain and overflow according to the approved installation guide.
2. Position the tub carefully over the prepared drain.
3. Check level in both directions.
4. Connect the waste outlet and overflow.
5. Install or complete the tub filler connection.
6. Fill the tub slowly.
7. Inspect the drain, overflow, supply lines, and surrounding floor for leaks.
8. Drain the tub and inspect again.
9. Apply sealant around the base only where recommended by the manufacturer.
10. Allow sealant to cure fully before normal use.
A full water test is not optional. A drain connection may appear secure when empty and leak only under the weight and movement of a filled tub.
Material affects comfort, appearance, installation weight, durability, and brand positioning. It also affects how contractors handle the product on site.
| Material | Main Advantages | Installation Considerations | Best Fit |
|---|---|---|---|
| Acrylic | Lightweight, cost-effective, warm to touch, broad shape range | Needs stable support and careful handling to prevent scratches | Residential projects and high-volume OEM programs |
| Solid surface | Premium feel, matte finish, repairable surface, strong insulation | Heavier than acrylic; verify floor load and handling route | Luxury homes, hotels, designer collections |
| Stone resin composite | Sculptural appearance, substantial feel, good heat retention | Higher weight; detailed structural planning may be needed | Premium showroom and hospitality projects |
| Cast iron | Exceptional durability and heat retention | Very heavy; may need additional structural support | Heritage, luxury, and long-life installations |
| Enameled steel | Durable surface and traditional appearance | Can feel cooler and may have less insulation than composite materials | Value-focused and classic designs |
For a manufacturer supplying overseas brands, material selection should also consider container efficiency, breakage risk, packaging protection, local consumer preferences, warranty exposure, and replacement-part availability.
The visual simplicity of a freestanding tub can be misleading. The product has fewer visible surrounding components, so every exposed detail needs to be correct.
- Ordering a tub before confirming the drain rough-in
- Installing a floor-mounted faucet without verifying the valve system
- Ignoring the filled-tub load on upper floors
- Failing to level the finished floor beneath the tub
- Leaving insufficient cleaning or maintenance clearance
- Using a drain kit that is not approved for the selected bathtub
- Sliding the bathtub over finished tile
- Skipping a full water and overflow test
- Sealing the tub in a way that prevents required service access
- Selecting a tub that cannot pass through the completed doorway
One practical site method is to tape the tub's full footprint onto the floor before ordering. Walk around it, open doors, stand where the user will step in, and check faucet reach. This low-cost exercise often exposes spacing problems before they become expensive changes.
A freestanding bathtub is not automatically the right upgrade. In compact bathrooms, an alcove tub can deliver better functionality, easier shower integration, and more efficient use of wall space.
Choose an alcove tub when:
- The bathroom is narrow or heavily constrained
- The tub must also function as a shower enclosure
- Moving the drain would require excessive slab demolition
- Floor structure cannot support a heavier tub
- The project budget prioritizes waterproofing, shower performance, or storage
- The target market requires practical family-bathroom layouts
The best design solution is the one that balances appearance, maintenance, bathing comfort, installation reality, and long-term reliability.
For bathroom brands, wholesalers, developers, and renovation contractors, a successful freestanding bathtub project begins with complete technical coordination. The bathtub, drain kit, overflow, faucet, floor finish, waterproofing system, and packaging plan should be reviewed as one connected solution.
Jiaxing Miluo Smart Home Co., Ltd. supports international partners with customized modern bathtub and bathroom product solutions, including OEM and ODM development. From tub shape and material selection to private-label packaging and coordinated product specifications, the goal is to help brands create a reliable, differentiated bathroom collection for their market.
Planning an alcove-to-freestanding tub conversion or developing a private-label bathtub range? Contact Miluo Smart Home to discuss your technical specifications, customization requirements, and project needs.
Yes, but the new tub's drain location must align with the existing plumbing or the plumbing must be relocated. You also need adequate clearance around the tub, a level finished floor, and a suitable faucet solution.
Not always. It depends on the bathtub weight, water capacity, occupant load, floor framing, joist span, and subfloor condition. Large stone composite and cast iron tubs deserve special attention, especially on upper floors.
Yes. Many freestanding tubs are positioned near a wall to save space and simplify faucet placement. Leave enough clearance for cleaning, splash management, and maintenance based on the tub and faucet specifications.
It can be more complex than a wall-mounted faucet because water supply lines must be routed through the floor. It should be planned before flooring is installed, and the valve body must be aligned precisely with the finished tub position.
The largest challenge is usually hidden plumbing. An alcove drain is often located near a wall, while a freestanding tub may require a floor drain in a different position. Floor opening, pipe rerouting, and waterproofing can add substantial labor.
Follow the bathtub manufacturer's installation instructions. Many models use a neat silicone bead at the base to help reduce water intrusion and stabilize the installation, but sealing methods vary by product design.
They can be easier to clean around if enough clearance is provided. However, a tub placed too close to walls or fixtures can create hard-to-reach gaps. Plan cleaning space during layout design rather than after installation.
1. International Code Council. [International Residential Code, Chapter 27: Plumbing Fixtures]
2. Vintage Tub & Bath. [How to Install Freestanding Tubs]
3. Kingston Brass. [How to Install a Freestanding Tub]
4. Houzz. [11 Big-Picture Bathroom Remodeling Trends]
5. UpCodes. [Section 607: Bathtubs]
6. Vintage Tub & Bath. [Plumbing Codes: Will My Clawfoot Tub Pass Inspection?]


