
Views: 282 Author: Miluo Smart Home Publish Time: 2026-08-22 Origin: Site


Content Menu
● Quick Answer: Recommended Tub-to-Wall Gap
● Why the Gap Between a Tub and Wall Matters
>> 2. Moisture Management and Surface Protection
>> 3. Plumbing Service and Future Repairs
● The Best Gap by Bathtub Type
>> Freestanding Bathtubs: 4–12 Inches
>> Back-to-Wall Bathtubs: 0–1 Inch
>> Alcove Bathtubs: No Cleaning Gap Required
● How to Choose the Right Clearance
>> Step 1: Measure the Tub's True Outer Dimensions
>> Step 2: Test the Cleaning Reach
>> Step 3: Consider the Wall Material
>> Step 4: Plan the Faucet and Drain Together
● Common Layout Mistakes to Avoid
>> Ignoring the Bathtub Exterior Shape
>> Using the Same Gap on Every Side
>> Forgetting Delivery and Installation Access
● Expert Recommendation for Brand Buyers
● Choose a Bathtub That Works Beyond Installation
● FAQ
>> How much space should be left behind a freestanding bathtub?
>> Is a 2-inch gap between a bathtub and wall enough?
>> How far should a freestanding bathtub be from the wall?
>> Can a freestanding bathtub sit against a wall?
>> Does the bathtub need clearance in front?
>> Should the faucet side of a bathtub have more space?
>> What is better for a small bathroom: freestanding or back-to-wall bathtub?
For most freestanding bathtub installations, a 4–6 inch (100–150 mm) gap between the tub and the wall is a practical minimum for routine cleaning. If the bathroom layout allows, 8–12 inches (200–300 mm) provides much better access for wiping the wall, cleaning the floor, checking plumbing, and preventing hidden moisture buildup.
For a premium bathroom, the correct bathtub-to-wall gap should never be decided by appearance alone. It must balance cleaning access, bathtub style, plumbing layout, splash control, maintenance needs, and available room size. For OEM and ODM bathtub projects, this is one of the most important details to confirm before production and installation.

The right clearance depends on the bathtub type and whether the side is intended to be accessible.
| Installation situation | Recommended wall gap | Best use |
|---|---|---|
| Tight-space freestanding tub | 4–6 in / 100–150 mm | Minimum practical cleaning access |
| Standard freestanding bathtub | 6–8 in / 150–200 mm | Comfortable cleaning and visual balance |
| Luxury freestanding bathtub | 8–12 in / 200–300 mm | Easy access, maintenance, and premium appearance |
| Faucet or service side | 6–12 in / 150–300 mm | Access to floor-mounted fillers, valves, and fittings |
| Alcove bathtub | Designed to meet the wall | Uses sealed joints rather than a cleaning gap |
| Back-to-wall bathtub | Usually 0–1 in / 0–25 mm | Compact layouts with a concealed edge |
A 4-inch gap is often the smallest workable space for a cleaning tool or narrow hand access. However, it is not always comfortable. If a homeowner cannot easily reach the floor or wall behind the bathtub, the gap may become a dust, hair, soap residue, and moisture trap.
For accessible bathtub installations, requirements may also apply to the open floor area in front of the tub. In the United States, the federal accessibility standard specifies a minimum 30-inch-wide clear floor area along the length of an accessible bathtub. This requirement is different from the gap behind or beside a freestanding tub, but both should be considered during bathroom planning.
A bathtub installed too close to the wall can look clean on the first day. After months of use, however, the narrow space may become difficult to maintain.
From a product-development and installation perspective, the tub-to-wall gap affects far more than cleaning.
The main purpose of the gap is simple: it gives users space to clean.
A narrow gap can make it difficult to:
- Remove hair, dust, and lint from the floor.
- Wipe splashed water from wall tiles.
- Clean the exterior surface of the bathtub.
- Reach corners where soap residue can collect.
- Dry the area after bathing.
- Inspect silicone, grout, and wall finishes.
A gap of less than 2 inches (50 mm) is usually too narrow for normal cleaning. It may allow water and debris to enter but prevent a hand, cloth, mop head, or vacuum attachment from reaching the space effectively.
For this reason, a bathtub should either be:
- Close enough to the wall to be fully sealed, as with an alcove or back-to-wall bathtub; or
- Far enough from the wall to be genuinely accessible, as with a freestanding bathtub.
The worst option is often an unsealed, hard-to-reach gap.
Bathrooms are high-moisture environments. When water splashes behind a freestanding tub and cannot be wiped away, it can leave mineral deposits, soap film, and persistent dampness on the floor or wall.
Over time, moisture trapped in a difficult-to-access area may contribute to:
- Discoloration around grout lines.
- Mildew on silicone seals.
- Water spotting on wall finishes.
- Odors from accumulated dust and damp debris.
- Deterioration of improperly protected wall materials.
Regularly removing soap residue from tub and shower surfaces, including silicone areas, is part of standard bathroom maintenance. A practical cleaning gap makes this maintenance realistic rather than optional.
A freestanding bathtub may use a floor-mounted faucet, wall-mounted mixer, concealed drain, overflow assembly, or flexible water supply connections. The installation should allow professionals to inspect and service critical components when needed.
A bathroom designer may choose a narrow visual gap, but the installer still needs to consider:
- Drain and trap access.
- Overflow connection inspection.
- Floor-mounted bathtub filler location.
- Hand-shower hose movement.
- Valve maintenance.
- Leak detection.
- Replacement of damaged floor finishes.
For the faucet side, allowing at least 6 inches (150 mm) is often more practical than treating every side of the bathtub equally. This creates a usable service zone while preserving a compact layout on less critical sides.
Not all bathtubs should have the same clearance. The correct dimension depends on how the bathtub is designed to meet the room.
A freestanding bathtub is normally intended to be visible from multiple sides. It can become the visual centerpiece of a luxury bathroom, but only if it has enough surrounding space to look intentional.
For a standard freestanding tub, use the following guideline:
- 4–6 inches: Suitable for compact bathrooms and basic cleaning access.
- 6–8 inches: A balanced choice for most residential projects.
- 8–12 inches: Best for high-end bathrooms, hospitality projects, and easy maintenance.
- 12 inches or more: Appropriate when the bathtub is positioned as a central architectural feature.
Some bathtub installation guidance recommends 2–4 inches as a basic clearance for cleaning around a freestanding tub, while other layout guides recommend 4–6 inches as a minimum practical range and 8–12 inches for more comfortable access. In real projects, the ideal choice depends on the bathtub profile, wall finish, cleaning routine, and available floor area.
For premium projects, I generally recommend planning 6 inches as the minimum target and moving toward 8 inches or more whenever room size permits.
A back-to-wall bathtub combines the clean visual effect of a built-in bath with the sculptural form of a freestanding model. It is designed to sit directly against the wall or with a very small installation tolerance.
This style works well when:
- The bathroom is compact.
- The wall behind the tub will receive frequent splashes.
- The buyer prefers a cleaner, more space-efficient appearance.
- Cleaning behind a freestanding tub would be inconvenient.
- The plumbing arrangement is designed for a wall-side installation.
The key is proper sealing. A small gap should not become an open channel for water. The installer should follow the bathtub manufacturer's instructions for wall contact, leveling, silicone sealing, and plumbing connections.
An alcove bathtub is installed between three walls. It does not require a walk-around cleaning gap because the bathtub edge is integrated with the wall assembly.
Instead, the installation relies on:
- A secure flange connection.
- Waterproof wall backing.
- Tile or wall-panel detailing.
- A correctly finished tub deck.
- Sealed transitions at the bathtub rim.
When replacing an alcove bathtub, installers typically need access to the tub flange and wall structure. For example, replacement guidance may involve opening wall sections above the tub and removing fasteners connected to studs. This highlights why waterproofing and correct installation are more important than leaving an open gap in an alcove configuration.
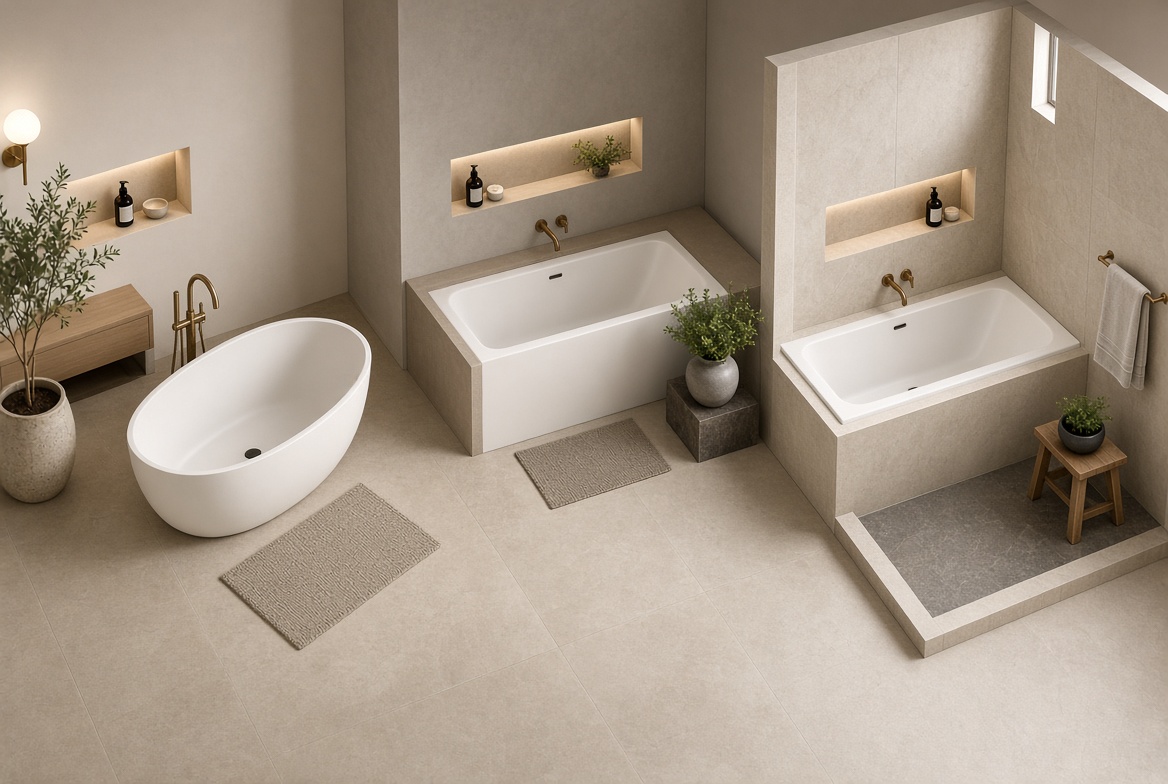
Before selecting the final gap, evaluate the bathroom as a working space—not only as a rendered image.
Use the finished outside dimensions of the bathtub, not only the nominal product size.
For example, a "59-inch bathtub" may have:
- A 59-inch outer length.
- A wider rim or curved exterior profile.
- A floor footprint smaller than the widest point.
- A floor-mounted faucet that needs additional space.
- A sloped backrest that affects wall distance visually.
For custom bathtub projects, suppliers should provide a detailed technical drawing showing:
- Overall length, width, and height.
- Drain location.
- Overflow location.
- Net and gross weight.
- Recommended faucet zone.
- Required floor opening or drain specification.
- Suggested wall clearances.
- Installation tolerance.
A useful design question is: Can a person reach the floor and wall behind the tub without kneeling awkwardly or moving the bathtub?
A simple pre-installation test can prevent a costly layout mistake:
1. Mark the bathtub footprint on the floor with tape.
2. Mark the planned wall gap.
3. Place a mop, vacuum nozzle, or cleaning cloth into the space.
4. Check whether the user can reach the back wall and floor.
5. Confirm that water supply and drain service points remain accessible.
If the tool cannot enter the gap, or a person cannot reasonably clean it, increase the clearance or select a back-to-wall bathtub.
The wider the gap, the more visible and maintainable the wall becomes. This matters especially when selecting wall finishes behind a freestanding bathtub.
Suitable finishes may include:
- Porcelain or ceramic tile.
- Large-format sintered stone panels.
- Solid-surface wall panels.
- Moisture-resistant natural stone with proper sealing.
- Waterproof decorative panels.
Avoid relying on ordinary painted drywall in an area that will receive routine splashing and may be difficult to dry.
A freestanding bathtub is often paired with a floor-mounted faucet. The faucet location should not force the tub too close to the wall.
Confirm:
- The spout reaches the tub interior without overspray.
- The hand shower can be used safely.
- The faucet handle can move freely.
- The installer can secure the faucet base.
- The bathtub can be positioned without interfering with the drain.
- The service side remains reachable.
A beautiful bathtub can still become a poor user experience if the filler is too close to the wall or the cleaning zone is blocked by a large faucet body.
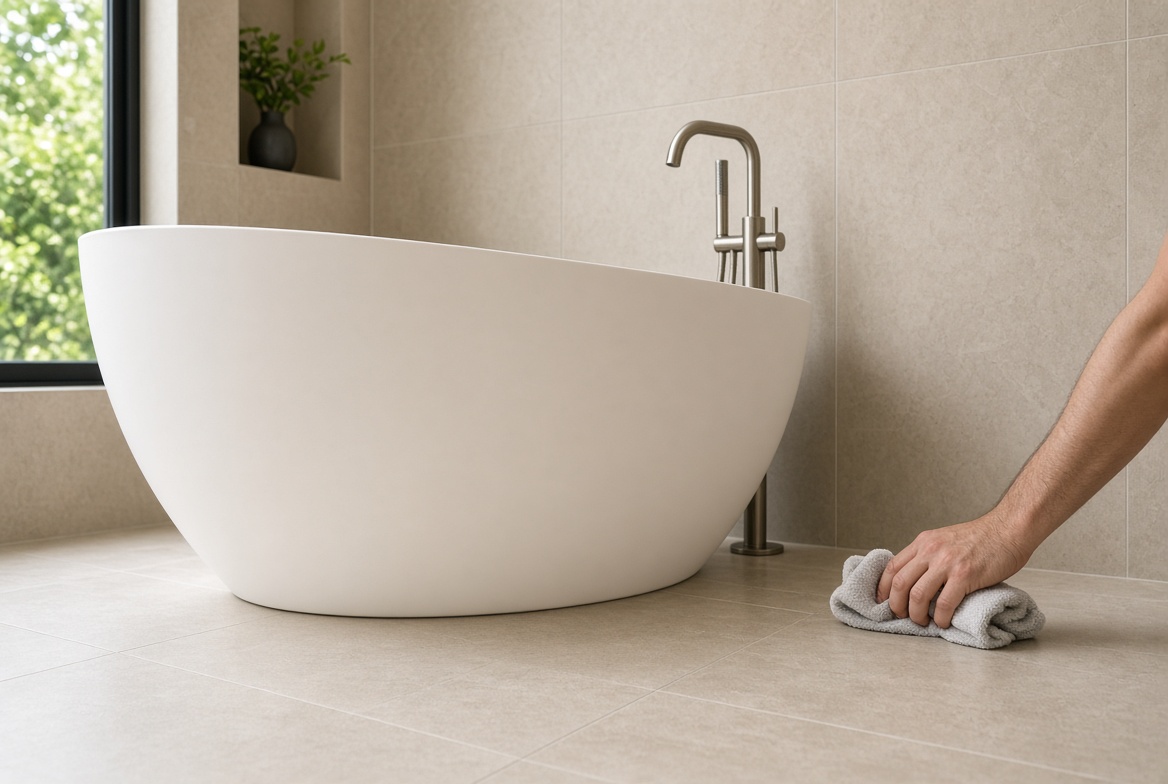
A 1–3 inch gap may look acceptable in a showroom photo, but it is often too narrow for effective cleaning. Dust, hair, and water can enter the space while tools cannot.
If the tub is meant to stand away from the wall, create a usable gap. If the project needs a compact silhouette, choose a bathtub designed to sit against the wall.
Oval, egg-shaped, slipper, and asymmetrical bathtubs do not have a uniform distance from the wall. The widest point may be much closer than the tub ends.
Always measure clearance from the widest part of the bathtub body, not from the rim corner or centerline alone.
The most important clearance is often not symmetrical. A bathtub may need more space on the faucet side, drain-service side, or wall facing the primary cleaning route.
In a constrained bathroom, prioritize clearance where it creates the most practical value.
The bathroom may fit the bathtub, but the delivery route may not. Before finalizing a large freestanding bathtub, verify:
- Door width.
- Hallway turns.
- Elevator size.
- Stairway landings.
- Protective packaging dimensions.
- Bathroom door swing.
This is especially important for stone-resin, solid-surface, cast-stone, and oversized soaking bathtubs.
For distributors, hotel developers, bathroom brands, and project buyers, bathtub clearance should be included in installation documents—not left to interpretation at the jobsite.
A complete product package should include:
- Dimensioned technical drawings.
- Installation instructions.
- Drain and overflow specifications.
- Faucet compatibility guidance.
- Recommended wall-clearance range.
- Cleaning and maintenance instructions.
- Packaging and handling details.
- Customization options for size, color, finish, and accessories.
At Jiaxing Miluo Smart Home Co., Ltd., the best bathtub solution is not simply the one with the most attractive shape. It is the product that fits the customer's room dimensions, installation method, cleaning expectations, and brand positioning.
For most modern freestanding bathtub projects, specify 6–8 inches of clearance where practical. For compact bathrooms, use 4–6 inches only when the cleaning route remains workable. For a wall-hugging layout, select a dedicated back-to-wall bathtub instead of forcing a freestanding model into an inaccessible gap.
The right gap between a tub and the wall makes daily cleaning easier, protects surrounding finishes, and supports long-term maintenance. In most cases, 4–6 inches is the minimum practical clearance, while 6–8 inches offers a better balance between usability and space efficiency.
Jiaxing Miluo Smart Home Co., Ltd. supports international brands, wholesalers, and manufacturers with customized modern bathtub and complete bathroom product solutions. Contact our team to discuss OEM or ODM bathtub dimensions, materials, finishes, technical drawings, packaging, and installation requirements for your target market.
Leave at least 4–6 inches (100–150 mm) behind a freestanding bathtub for basic cleaning access. For a more comfortable cleaning and maintenance experience, allow 6–8 inches or more.
Usually, no. A 2-inch gap may allow water, dust, and hair to collect but is often too narrow for a hand, cloth, vacuum nozzle, or mop to clean effectively. It is better to use a sealed back-to-wall design or increase the space.
For most projects, 6–8 inches (150–200 mm) is a strong target. Small bathrooms may use 4–6 inches, while luxury layouts can benefit from 8–12 inches of space.
A conventional freestanding bathtub should generally not be forced tightly against a wall unless the manufacturer specifically permits it. For this layout, choose a back-to-wall bathtub designed for wall-side installation and sealing.
Yes. The floor area in front of the bathtub affects safe entry, cleaning, and general circulation. In accessible installations, a clear floor area measuring at least 30 inches wide along the length of the bathtub may be required.
Often, yes. The faucet side may need extra room for installation, hand-shower movement, valve access, cleaning, and future maintenance. A 6–12 inch service-side clearance is often more practical than a minimal gap.
A back-to-wall bathtub is usually the better option for a small bathroom because it eliminates the difficult-to-clean gap behind a freestanding tub while retaining a modern, premium appearance.
1. [U.S. Access Board — Chapter 6: Plumbing Elements and Facilities]
2. [The Home Depot — How to Remove and Replace a Bathtub]
3. [Bath Fitter — Maintenance and Cleaning Guide]
4. [HOROW — Installing a Freestanding Tub: Step-by-Step Guide]
5. [HOROW — Freestanding Tub Dimensions Guide]
6. [U.S. Access Board — Accessibility Standards for Bathtub Clearance]


